Wednesday, December 21, 2011

Little Girl Dresses

If I'm good at anything, it is little girl dresses:D I was so excited to find this fabric and as I was making several dresses as a gift, I went to my favorite technique -- t-shirt top dresses. I found two tops at Target for cheap. Using the heavier cotton fabric with the most adorable owls, I made a 2T dress. Every little girl has to have pockets, so Alexis blanket stitched the pocket for me and Lois did my applique owl sticking out of the pocket --- too cute!     


With the remaining t-shirt parts, I made this adorable headband which matches both dresses....Bonus!
Dress #2 which is about an 18 month old dress size:

Fingerprint Bead Party!

I have wanted to have this party since summer....I have planned and analyzed the best way to make it happen for months...It was wonderful! Almost 30 of us made Fingerprint Bead Jewelry, sharing our prints and fellowshipping for about 4 hours. 

Although the project is pretty simple, what gets complicated is the coordination of how many beads per person as you don't know who will want to have who's bead and what type of jewelry they will make. Some chose beads based on color and others on who made them. I thought at least one person might make a piece of jewelry with just their own prints to give as a gift,  but I don't think anyone did. 


To help plan, our family made fingerprint bead necklaces for a few relatives and ourselves. Even my husband gave us his prints :D These necklaces above are made from our family prints...

We planned the party in 3 phases... the bead printing phase, bead finishing phase, and the jewelry making phase. 
     
Bead Printing Phase: 
  •  Use 0.15 oz of black Sculpey clay (yes, we weighed each bead); 
  • Roll it into a sphere; Insert a jewelry eyepin (the ones with the loop on one side) through the center
  • Rub PearlEx Pigments  on your index finger and thumb. Press the sphere into a flattened circle (see photos) and carefully remove your fingers. You should have left a nice clean imprint;  We had both series 1 and 2 of the PearlEx pigments. I had everyone write their name under the color they chose;
  • Place the beads into a glass dish on an index card (we put names on the cards to keep them identified);
  • Bake according to the clay's directions; 
  • Cool the beads.

Bead Finishing Phase: 
  • Use gloss varnish to make the beads shiny (this is optional); 
  • Dry with a hairdryer if you are in a hurry -- we were :D
  • Cut the straight end of the eyepin and make a loop on that side to match the other side.
  • While some of us were working on this part, Alexis taught many of the ladies how to make paper boxes (pictured at the top)... Everyone was able to take their beads in their paper box to our jewelry making stations set up with all the findings and a wide array of beads. 
Jewelry Making Phase: 
  •  Some connected the beads with just a ring, adding a pendant is beautiful...(right)
  • Others added beads in between the fingerprints...(left)
  • Imagination -- most anything goes as these black beauties are simply magical!


All the jewelry was beautiful and unique...I had so much fun sharing this project with our friends -- Thank you all for coming :D
Who can you share your prints with this Christmas?

Thursday, December 15, 2011

Painted Ornaments and Mugs

I posted previously about painting mugs... 
I have found them to really hold up and wanted to make some more. 
They came out pretty busy, but I just loved them! 

 I also found these really neat "squished" balls that have the perfect flat surface for painting on. One night as I was waiting to fall asleep I had the idea to paint something on one side that you "see through" to the other. I thought of a pine branch on one side with a bird on the other. However, I haven't ventured into birds with this paint. I am used to being able to layer the paint and with the enamel paint it pulls itself off. I then returned to one of my favorite themes...irises and dragon flies! Fun. Here are my creations... 
dragon fly on the one side
irises on the other
My daughters made some beautiful paper boxes for me to wrap them in and give them to the ladies at our coop as gifts. I will have to post a photo of the remaining boxes later. They are the perfect size for many of our handmade items, including crochet roses :D

Friday, November 25, 2011

Turkey Anyone?

What was for dinner at your Thanksgiving get-together?  Lexi lucked out as my mother-in-law cooked Thanksgiving dinner this year. We brought my "world famous" pumpkin pie (not sure how it became that?) and an appetizer. 


I wanted to tell everyone about my most fabulous "Christmas Cheese"! It wouldn't be a holiday without it... So easy and so unexpectedly yummy! This recipe came from Creme de Colorado and is called Maroon Bells Cheese Spread. It is simply

          2.5 cups shredded Extra Sharp White Cheddar Cheese (10-12 oz)
          1/3 cup grated onion
          2 Tbsp mayonaise
          Raspberry Preserves as a topping (~1/2 cup)
          Triscuits

Now the recipe calls for mixing the first 3 ingredients and making a mound, pouring the raspberry preserves over it and eating it with Triscuits --- It has to be Triscuits! They are so good with this.

However, this screams SCULPTURE OPPORTUNITY! So, years ago, I began by making a Christmas ornament, a pair of bells, my friends initials for a bridal shower, the new year's year, holly leaves (I know they are supposed to be green, but it was cute), poinsettia flower, bow, pumpkin, and leaves.... that is what I chose this year.  Here is the sculpted cheese. It is best to then put this into the refrigerator and add the preserves right before hand. Spoon the preserves gingerly into the design to avoid getting them on the raised design.


Not being the best blogger, I forgot to take a photo until after it had been significantly dug into! Please use the serving utensil, girls!

Hope this inspires you to make your food into art this holiday!

Tuesday, November 22, 2011

Eggshell Mosiac

This was one of the coolest projects I have done with my students. I found it on dickblick... AND it is even incredibly more beautiful than the pictures. I enjoyed teaching about the color wheel and the history of mosaics -- I loved this website.  It is also interesting to learn about the use of ostrich egg mosaics in Namibia.  Here is a little photo instructional:

Eggshells are "crushed" onto a canvas using white glue.

Once the glue dries, you add liquid watercolor -- undiluted! Use analogous colors for the best results.

Be generous... and quick. The inside of the shells absorb more color than the outsides.


This is where it gets tricky.... You have to remove the watercolor from the eggshell tops to expose them. Using the diluted gloss varnish, a paint brush and my best friend - a q-tip - move the color to the 'valleys'!


Finally, I found that Triple Thick was the best way to go to finish them off. They are beautiful! I will post photos of the students' finished projects -- I bet they will be really neat... 

Time to Knit, Crochet, and Finish!

It is that time of year again...I just don't seem to want to knit or crochet in the summer months. I pulled out a cable item I started last year and when I am not too tired to think, am working on that. I also made a knitted neck warmer.  I believe it can be called an infinite one as I connected it with a twist in it. I love it so much I am making another just like it to give away. It was fast and my favorite kind on knitting -- the kind that has fuzzy stuff so there is less ability to inspect the evenness of my stitches!

Last year I knitted this cowl. I LOVE it! I didn't follow the pattern (not because I didn't try) and so it became mine. I'm good with that :D I discovered that they don't 'pull' on my neck like a scarf, and they make a lighter weight or cotton sweater nice and toasty.

I also am crocheting on another item I can't post about -- I have a hard enough time working on things in private as it is-- to have anything be a surprise at Christmas. It is, however, an item I saw on Grosgrain.


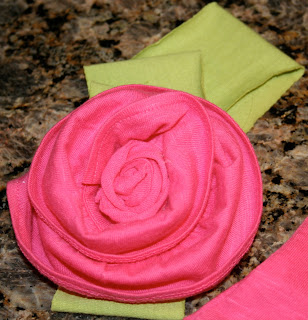
Time to finish things up...  A few weeks ago, I put together these fabric flowers. I finally bought the pins to go on the back of them.

Oh- And my oldest daughter and I modified a dress we bought for recital... dresses are often too low in the front (this one was just about 1/2 inch too low), so we have creatively used this black sheer material to add both a small ruffle at the neckline and a straight 2" addition to the hem. It tied in beautifully and was the perfect length for her as well.

I have several other projects needing to be finished. I will post about those soon.  Happy completions!

Wednesday, November 9, 2011

More Curtains

My husband's office has some beautiful cornice boards I upholstered when we first moved in. I had intended to make drapes to go beneath, but never did. I used to have a sort of stick type shade that rolled up and down, but they were ruined by the sun and have long since gone away. I temporarily put up some pinch pleat curtains my mother-in-law took down from her house when she moved in (I actually got some wonderful things out of that deal!) ...  anyway, I digress... I used the beautiful silk ribbon fabric that my mother send to go over the fabric I 'stole' for the foyer curtains (other post.) The color was too green for my foyer, but is great in the office. I had two pieces - one which was a little longer than a window length and the other that was three times the window length. Creativity kicked in and I made it work!

I used the shorter piece as the fullness of the curtain that 'swoops' over -- it ends at the tassle tie {which I purchased at Michael's at a steal for about $2 each! (but, don't pull on those curtains, dear!) And I cut the other piece in half and used it for the 'to the floor' panel. I did sew them together so there would be no peaking amongst the swoop.  :D  The ribbons in the curtain hide the seam beautifully.


I am tickled with them... but my husband does need to block the incredibly bright morning sun that comes in those windows. So, I used the free pinch pleat curtains to make two roman shades. I simply cut off the top to 1" longer than the inside window height, and I cut one side to 2" longer than the inside window width. I then only had to hem the one side! I added the rings on the back and tadah! you have a roman shade.


Now, I am left with just the school room valence then I am home free until the roman shades in my family room need to be replaced due to afternoon sun damage. Then we'll have another opportunity to see how the Lord will provide more abundantly than I deserve!


Friday, October 21, 2011

Paper Clay Leaves by Students...

I think they came out beautifully! What do you think?  
(I posted directions in a previous post.)


Tuesday, October 18, 2011

Foyer Fresh and Grande!


My mother gets some fabulous deals on fabrics...silk and high end designer. Often $3/yard! I am so blessed to work with such great fabrics and to have a mother with a good eye--she sends them to me from Colorado! Since early summer I have been working on finishing out and updating curtains in my home. Here is the first project - hopefully the scariest one, done! It came out just grande!

As you can see, this is quite the project! My husband and daughter  installing the mounting boards--after we did a "catch the rosette without squashing it" game... you should try it!

In designing these curtains, I used the golden mean principle. The sheers go at least 2/3 down the upper window and the long panels are tied off at 2/3 the entire length. Each panel is 5 yards. I found a great tip from a professional site, which I am sorry to say I can't find again to link, that said if you can avoid it, don't hem the sides of the long panels. I have had dealt many times with puckering on long panels and I was eager to avoid that nasty problem on this project. So, I used my friend's serger (life saver!) and my youngest daughter turned the side seams under 3/4" and ironed them down.

The second trick I found was to make sure you hang them far enough off the wall as the longer the fabric, the more it will "lean into the wall". I had my husband make 5" deep boards (mine were 20" long). He mounted them with two L brackets with a 1" gap at the wall for me to put the fabric into for the side of the curtain. It worked and the fabric hangs like a dream. 

I was also very concerned about being able to clean them, but knew that would be a tough one. I designed the panels with box pleats at the top and sewed them down.  I then sewed on sticky velcro...yes, sewed on the sticky--the last thing I wanted was to have my panels pealing off the mounting board! My husband (you're the man, honey!) put the velcro on the mounting boards and stapled them on to be sure they didn't peel off. Then he climbed the ladder with the panels and hung them up. Woohoo!
My back using the staple gun on the sheers... try getting the slick fabric just where you want it and then grabbing a staple gun, and trying to put enough pressure on it to staple...eeek!
 The sheer piece was another story. It just wasn't going to be coming down. We used two large nails to mount the "knot" of sheer fabric on. Then I made the rosette out of the draping fabric. I hot glued the back with extra fabric so that it would keep its shape which was handy in the tossing game. :D Anyway, that was when I had to just get up there and try to make the two sides work. Usually I am up and down and up and down -from side to side-working the fabric until I like the result. This was just way to high for that and too difficult to move the big ladder around the chandelier...  It was once or nothing in my mind. With my two middle girls on the landing giving somewhat vague directions (sorry, girls - but it was high up there and scary:!) we worked through. Add the tassles I purchased at Hancock for about $5 each and I can definitely live with it!


Thank you, honey, for being willing to climb that ladder for me so many times! I love the result. 
Do you have a scary decorating story?

Saturday, September 17, 2011

Paper Clay Leaves

I just LOVE it! It is easy to work with clay... softer than Sculpey and retains the texture of the leaves very well creating all the small detail the watercolor will highlight. It does dry out, but reconstitutes well with a dab of water. It also sticks to itself like a dream!

DickBlick had a project on their website to make these clay leaves. I just had to do it with my art students. It allows me to teach about God's amazing design of leaves, the Elements of Design: Shape, Positive/Negative Space, and Texture, use watercolor paints, and to make something practical (a must in my book at least once/twice a semester!) These are very light and become beautiful necklaces (as you can see!) I suggested that they would be lovely and inexpensive gifts for their family this Christmas. 
  • Start with a roll and place on bottom side of the leaf... cut the roll to the length of the leaf.   
  • Roll it out gently to between 1/8" and 1/4" depending on how you will use it (how sturdy you need it to be -- thicker for more durability) 
  • Keep the leaf on the clay until the VERY END! 
  • Cut away the extra around the edges.
  • Now smooth the edges with wet fingers.
  • Finally, add any serrated edges the leaf may have by "denting" the clay with a straight edge tool at the same angle as the leaf veins. 
  • Make one final pressing of the leaf and shape the leaf in a natural way.
  • Remove the leaf -- add a hole with a toothpick if you want to hang it.  Vwallah!

I twisted and curved this leaf for a more natural look.
Before gloss varnish...

I can't wait to see all the student's creations... I will try to post pics for you to see how wonderfully they did!